Design Goals for Beneath the Ikor Quag Sinkhole
As previously mentioned, Beneath the Ikor Quag Sinkhole, is now available for purchase at itch.io. Now that it’s out, I’d like to discuss some of my design goals that drove the work. It’s difficult to discuss a design without getting into spoilers, either mechanical or narrative, so this is your warning that there will be some light spoilers ahead.
Have a Difficult to Reach Dungeon
I wanted a scenario where getting to the dungeon was half the challenge. When I read about the Ikor Quag region in the greater Vaarn setting with its toxic swamps, I thought about how cool it would be to have a dungeon at the bottom of one. My initial concept involved necrotech cult(s) in a grand Bioshock type space, but when I started working in earnest for the Vaarn ‘25 game jam I needed to reduce the scope, and went with a 13 room sunken spaceship. The key idea though is a dungeon with valuables being challenging to reach. It adds verisimilitude by answering why no one has already grabbed the valuables? It’s in a place most would not think to go to! It also feels more in tone with the general structure of an adventure story.
There are downsides to this approach. If it’s really hard to get somewhere there’s a good chance your players decide they’d rather go anywhere else. Since I am a fan of West Marches style sandbox play I don’t see this as a problem necessarily, but it could be a source of bad friction for some tables.
The Dungeon as An Order of Operations Puzzle
This might seem like a tangent, but I have a bigger point here, so bear with me. Here is a universal principle of design I believe in:
When considering the introduction of a particular design element into a work, ask what is gained by its inclusion.
An example to illustrate the point: The creation of realistic spaces is a type of design element that can be incorporated into an adventure. So if your setting is in a castle, the castle has rooms and a layout that conforms to our understanding of castles. What do you gain from this? It adds verisimilitude to the space, and makes it comprehensible to players. Then players can make informed decisions about choices they make. That’s a nice property for your adventure to have! But there are some properties that are not necessarily gained from realistic spaces. If your setting is a tower, perhaps there is only a spiral staircase, with the occasional room jutting out. That’s realistic, I’ve visited lots of towers like that, but it isn’t a space that will offer up interesting choices in play. So if the goal is to create an adventure where exploration generates interesting choices, realistic spaces as a design element can be a tool in our toolbox, but it can’t be the thing we are striving for without being in tension with our goal.
I mention this because I was thinking about the value of Jaquaysed spaces. I used to think the real value of a dungeon like Caverns of Thracia is how it convincingly creates interconnected histories within a space. But I started thinking more about what you get from the loops and actual node-structure of a Jaquaysed dungeon. And one fun property that can emerge from this type of space is you can transform your dungeon into an order of operations puzzle.
By an order of operations puzzle I mean that the players have a particular goal in mind, and to achieve that goal they will need to take some steps in a particular order, but although some steps are pre-conditions to subsequent steps, the steps you take are generally not fixed. That’s a fairly abstract description so a trivial example should help clarify. When getting dressed in the morning undergarments will always get worn before shirt & pants, and socks always come before shoes, but it makes no difference whether you put on your shirt first or your pants.
A good order of operations puzzle should complicate how the players navigate the space without ever acting as a hard blocker to progress. You can think of it as an extension of Sean McCoy’s blogpost about writing rooms in pairs. Features in some rooms are needed in others, and figuring out how it all comes together is the puzzle of the dungeon.
In the case of the adventure I wrote, the central puzzle comes down to if the engine core is active or not. Certain opportunities open themselves up, or make certain actions easier when it is turned off, but it also closes off other possibilities in the space. Also getting to the engine core without dying is a challenge, as the room leading up to it is filled with toxic ichor. Navigating it likely requires tools found elsewhere.
The engine core is also connected to the toughest opponent of the dungeon, the destined autark praetor, which presents a dillema as permanently killing the praetor is highly desirable, but the praetor’s eye is needed to reach the most valuable room of the dungeon. There are a wide variety of tools the PCs can use to accomplish these tasks, but getting them done in an order where they achieve their goal and avoid a TPK requires quite a bit of skill.
Minimum Viable Settlement
The basic loop of OSR/adventure roleplay is to explore a dangerous space, and then retreat to safety with treasure in hand. Settlements should have some personality and sense of place in the world, but if you create too much detail you risk imbalancing the locus of play. So it is encumbant on designers to get that balance right with a settlement that offers relative safety, but isn’t a space to get lost in if the focus of play is dungeon exploration. Dark Souls and Caves of Qud (Stiltgrounds notwithstanding) are obvious touchstones here with settlements the player can retreat to with interesting NPCs to briefly interact with, but the settlements are a far cry from places rooted in civil society.
These smaller settlements are ideal for a few reasons. It helps keep the main thing the main thing. I find it demoralizing as a GM to read adventures where the town takes up pages upon pages of detail if it isn’t a social adventure. Another feature is that in smaller settlements not all of the PC’s needs can be met. This means it is in the party’s interest to leave and go explore more. To take the Zixmorth settlement of my adventure as an example, there isn’t enough water to indefinitely sustain players. So that creates a time pressure. Also, if the party acquires all the exotica in the dungeon, there isn’t enough stuff worth trading in Zixmorth, so if players want to get the most out of their trades, they will need to move on.
I managed to keep the settlement details to a single page (page and a quarter if you include the list of hooks). The settlement description is a single paragraph, followed by details about how Zixmorthians react to outsiders. Then I have descriptions of the dozen inhabitants, each a sentence or two that gives some flavor of what they do, and perhaps some quirks about them. It is on the sparse side, and the NPCs could have benefitted from a bit more characterization, but it is also valuable to have all the information on a single page. There is enough here to give a sense of every NPC fulfilling a role within the logic of the space.
Doing Everything Myself
Unlike with my Mausritter adventure where it was a collaboration, and I only had to worry about the writing and dungeon layout, I wanted to do all the work myself for this adventure. This resulted in a significantly less slick product as I have no art training at all, and while I’ve learned a few things about graphic design, it isn’t something I’m well-versed in. But there is a great feeling of just putting something out into the world because you can. And you can still have a well designed work that looks nice and is easy to read even if it isn’t slick. We could use more of that in the indie RPG space, so this is also something I want to encourage others to emulate!
I will add that even though I planned for this zine to be art sparse, it ended up being extremely art sparse as I developed a wrist injury as I closed in on the deadline, and that limited the amount of drawing work I could do. So I ended up doing the bare minimum: a cover piece, and the maps. I plan to do an updated version that incorporates any feedback I receive, and to add a bit more art where it makes sense to more fully fill out the work.
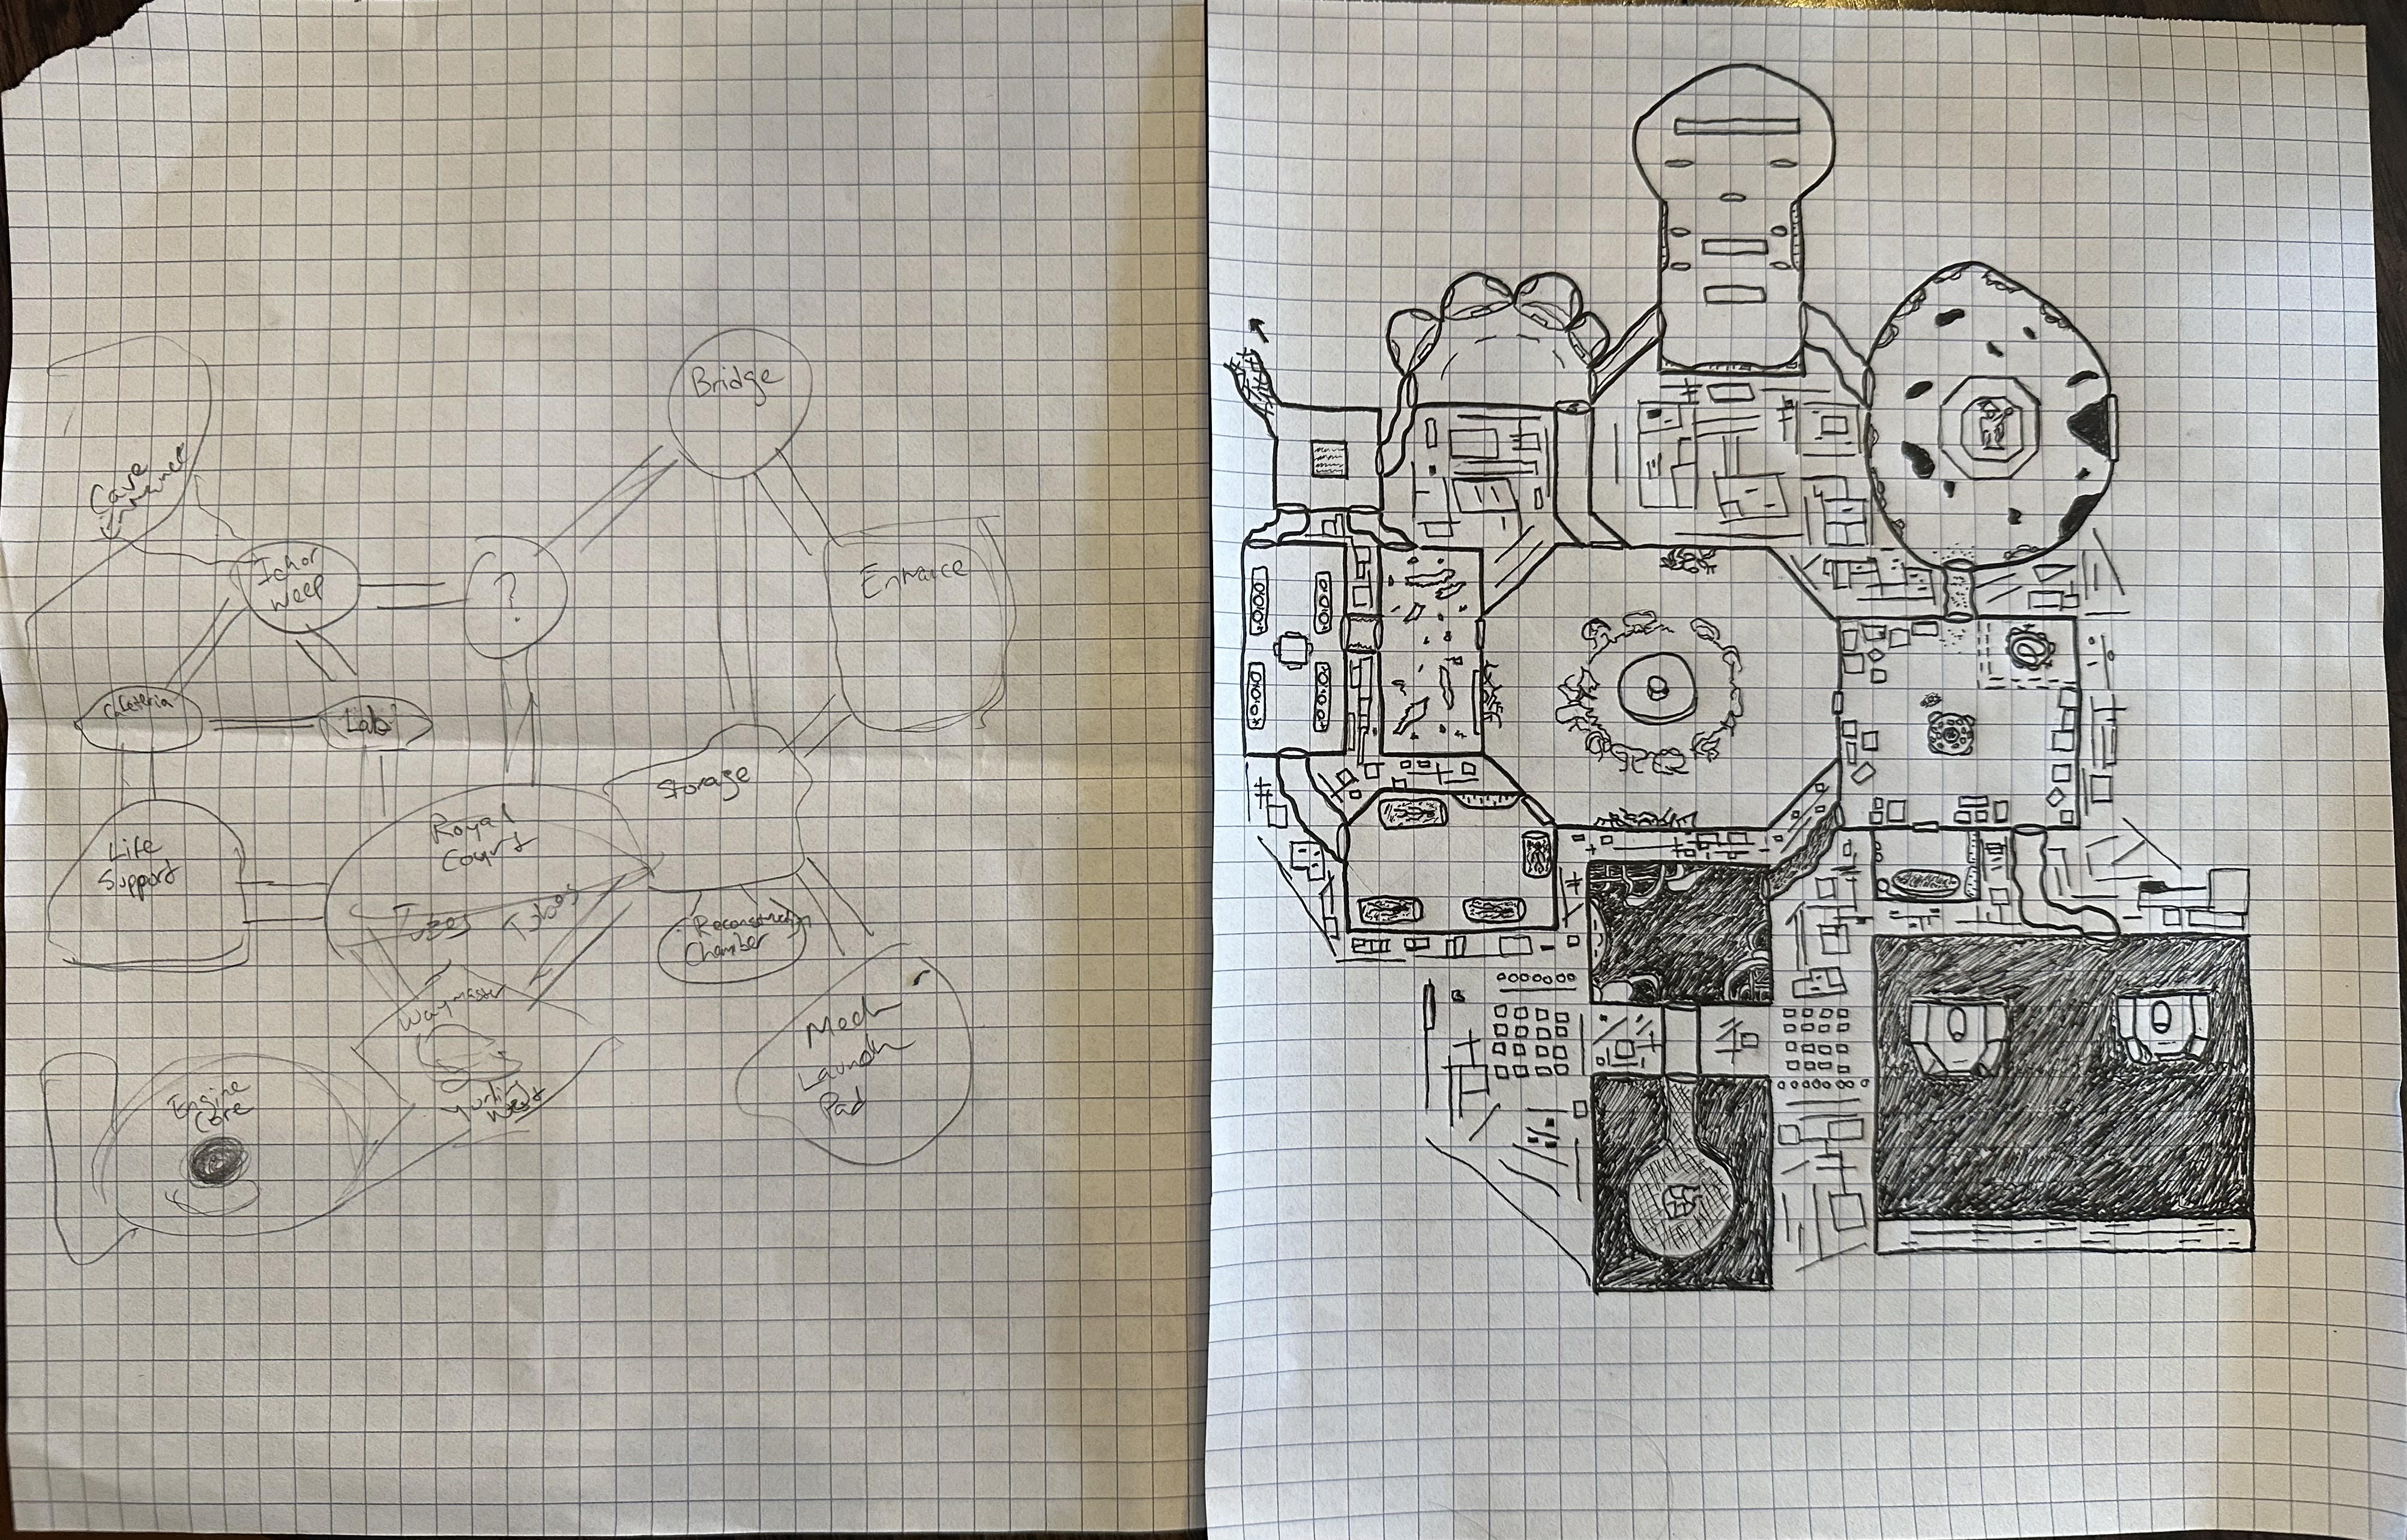
As a glimpse into the process, here is the initial sketch of the dungeon and the final composition. In this case the changes from first pass to finish ended up being fairly minor.
Doing Everything in Typst
This section is for the design/layout/tooling/how-to sickos. The Mausritter adventure was done in Affinity, which has become the standard for just about everyone that doesn’t want to spend the money on an Adobe license. And Affinity is great, if you learned how to work with it more power to you! But I only know how to do so much with graphic design software, so if I was going to release something on my own I needed something else. When I learned about Typst I knew this might be exactly what I was looking for. It is a more powerful layout tool than writing a document in markdown, and although it may not be as robust as something like LaTex, it also doesn’t have as steep a learning curve. Typst is a great tool for anyone comfortable with the command line terminal, but there is also a web app for people that find that unapproachable/intimidating. And Typst is free, and the documentation is good. So it is very much worth looking at.
The two best features of Typst are that you can see your changes to a document as you save without having to recompile everything, and you can programmatically create UI components for your layout. For example, my keyed dungeons featured a main column that takes up about 2/3rds of the page’s width, and then a second side column taking up the remaining space where headers, NPC stat blocks, and additional information would go. Here’s what that looks like in Typst:
#let main-content(body, sidebar) = {
  v(1em)
  grid(
    columns: (2fr, 1fr),
    gutter: 2em,
    [
      #set text(size: 9pt)
      #set par(leading: 0.8em, spacing: 1.2em)
      #body
    ],
    [
      #set text(size: 9pt)
      #set par(leading: 0.8em, spacing: 1.2em)
      #sidebar
    ]
  )
  v(1em)
}
I’ll break down how this code works. It will take a bit to get through everything, but the nice thing is once you have this component defined, you don’t really have to think about this stuff anymore.
#letis a key word that lets Typst know that you are declaring a definition that will get used later. The#character is a way of letting Typst know you are doing something to the document, and not trying to write words that appear on the page.main-contentis the name of the UI component we are defining. It could be any name you want it to be. Like if you were creating a UI component for rendering an encounter table you could call itencounter-table. By naming the UI component we can reuse it later (I’ll show how that is done in a bit).(body, sidebar)the words inside the parenthesis are called parameters or arguments. You can think of these things as inputs for the UI component. In other words, the body argument is going to be the text we have in the main body of the text, and the sidebar argument is going to be the text we include in the sidebar. This will become clearer when we show how the UI component is used.= {The equals sign indicates that we are now ready to define whatmain-contentis, and the angled brackets indicate that everything within the angled brackets is part of that definition.v(1em)Our definition of our new UI component takes a bunch of built-in layout tools that Typst already has, and packages them together. The first of those built-in tools isvwhich is short for vertical. It creates vertical spacing between things. So in this case, it creates 1em worth of vertical spacing between our UI component and whatever came before it. An em is a unit of measurement that is based on the body height of a typeface, so it will vary depending on the font and font size you are using. You could also use other units of measurement like points, inches, millimeters, whatever!gridGrid is an extremely powerful concept in graphic design, but this is what we’ll be using to actually define the column layout for our UI component. Our grid UI component takes a couple of arguments, described below.columns: (2fr, 1fr).columnstells Typst how many columns they should be, and how wide they should be. We are using a unit of measurement calledfr. fr units express measurements as ratios. So rather than trying to calculate what the actual width of the columns should be, we are telling Typst, however much width is available, dedicate 2/3rds of it to the first columns, and 1/3rd to the second column. If instead we wanted three columns of equal width, we would define it ascolumns: (1fr, 1fr, 1fr). Letting the computer do this work for us is great!gutter: 2emA gutter is the space between columns since we don’t want two bodies of text to run right up against each other. By setting it to 2em we provide a comfortable amount of space between our two columns.[...], [...]The square brackets represent the content for each column for our grid.#set text(size: 9pt)Sets the text of our first column to 9 point. Note how we are using the#in front of our layout definition again. This might seem a bit confusing, but essentially because the square brackets can include text content that will appear on the page of our PDF document, when adding additional layout definitions we need the#again.#set par(leading: 0.8em, spacing 1.2em)This is a layout definition for the paragraph. Leading is the amount of space between lines, and spacing is the amount of space between paragraphs. If there’s one piece of graphic design advice I can impart, it is that usually the default amount of space between lines is too small, so it is often worth increasing this value.#bodyRemember how we had the argument for(body, sidebar)at the beginning of our UI component definition, and how it is a kind of input? That input is now getting deployed here. Again, this will become more clear when we see how the UI component gets used.- The same thing happens for the square brackets for the sidebar, only we use the
#sidebarcontent instead of the#body. Note that although I used the same values for text and paragraph for both columns, they don’t have to be the same. - Finally, after our grid is defined, we include a bit of additional vertical spacing at the bottom with
v(1em).
So we now have a bunch of layout work done with just a few sparse lines of code. It is a lot to take in, but the Typst documentation is very good so you can read about how to do all this stuff, and everything is explained in detail. Here is how we would now use our UI component for a keyed dungeon description:
#main-content[
Pale green light comes in from a crack in the ceiling. In the center of the room a throne of mammoth bones seats a quivering mass of pustulant flesh. Skeletons and zombies dangle from chains affixed to the rafters.
][
== 18 Necromancer's Throne Room
#v(1em)

*Pustulant Flesh* - 4 HD, AC 13, d6 necrotic touch, Ml 9
]
So the key is in the main content column, and a header and stat block in the sidebar. Note how #main-content has two square brackets together, with the content inside of them. Those are the inputs for our UI component. The first is the body argument, and the second is the sidebar. These inputs get taken by our UI component and passed into our grid definition as content that it will layout for us based on the definitions we have provided. The header is defined by having the = signs in front of it where the number of equal signs corresponds to header types 1 through 4, with 1 being the largest, and 4 being small enough as to be indistinguishable from bold text. Since this uses two equal signs it is a header 2 type. We also create some vertical spacing between our header and stat block. This illustrates another important point. Although we have defined all these layout elements in our main-content UI component, we can still include additional layout changes within the body and sidebar inputs we pass to it. So we get the best of both worlds, we have a definition that can be applied consistently across our document, but we also have the means at our disposal to make individual changes and adjustments that we might decide is appropriate.
You can copy this code into the Typst web app and play around with it yourself if you are curious.